How to Design an Outdoor Sanctuary with a Gazebo: 10 Expert Tips for a Cozy Garden
Disclosure : This post may contain affiliate links or paid partnerships. I may earn compensation if you click a link or make a purchase, at no additional cost to you. See my disclosure for more info.
You own a backyard.
At some point, that probably felt like a luxury.
Now it mostly just feels like something to maintain.
You cut the grass. You occasionally weed. You look at it from the window and think about what it could be. Then you go back to the couch.
You’ve seen the version of this space that you’d actually want to spend time in. The kind with warm lights overhead, a gazebo that looks designed rather than placed, plants filling every gap between structure and lawn.
That’s not somebody else’s story. That can be your backyard.
A gazebo, done right, is the single highest-impact thing you can add to a lackluster outdoor space. These ten tips tell you exactly how to do it right.
The Real Problem with Empty Backyards — And Why a Gazebo Is the Right Answer
Inside your house, every room has a clear purpose. The bedroom is for sleeping. The kitchen for cooking. The living room for gathering. The furniture in each one communicates its function.
Your backyard, if it’s anything like most people’s, communicates nothing. It’s a stretch of green with no clear invitation to do anything specific in it.
The brain takes shortcuts: undefined space gets routed to “pass through” status. You walk across it. You don’t linger.
A gazebo introduces a destination. A place with a defined boundary that the brain can read as: here is somewhere to be.
The caveat: a gazebo by itself isn’t the destination. It’s the beginning of one. Everything you do to furnish, plant, light, and style it is what creates the actual experience.
That’s exactly what the following ten tips are about.
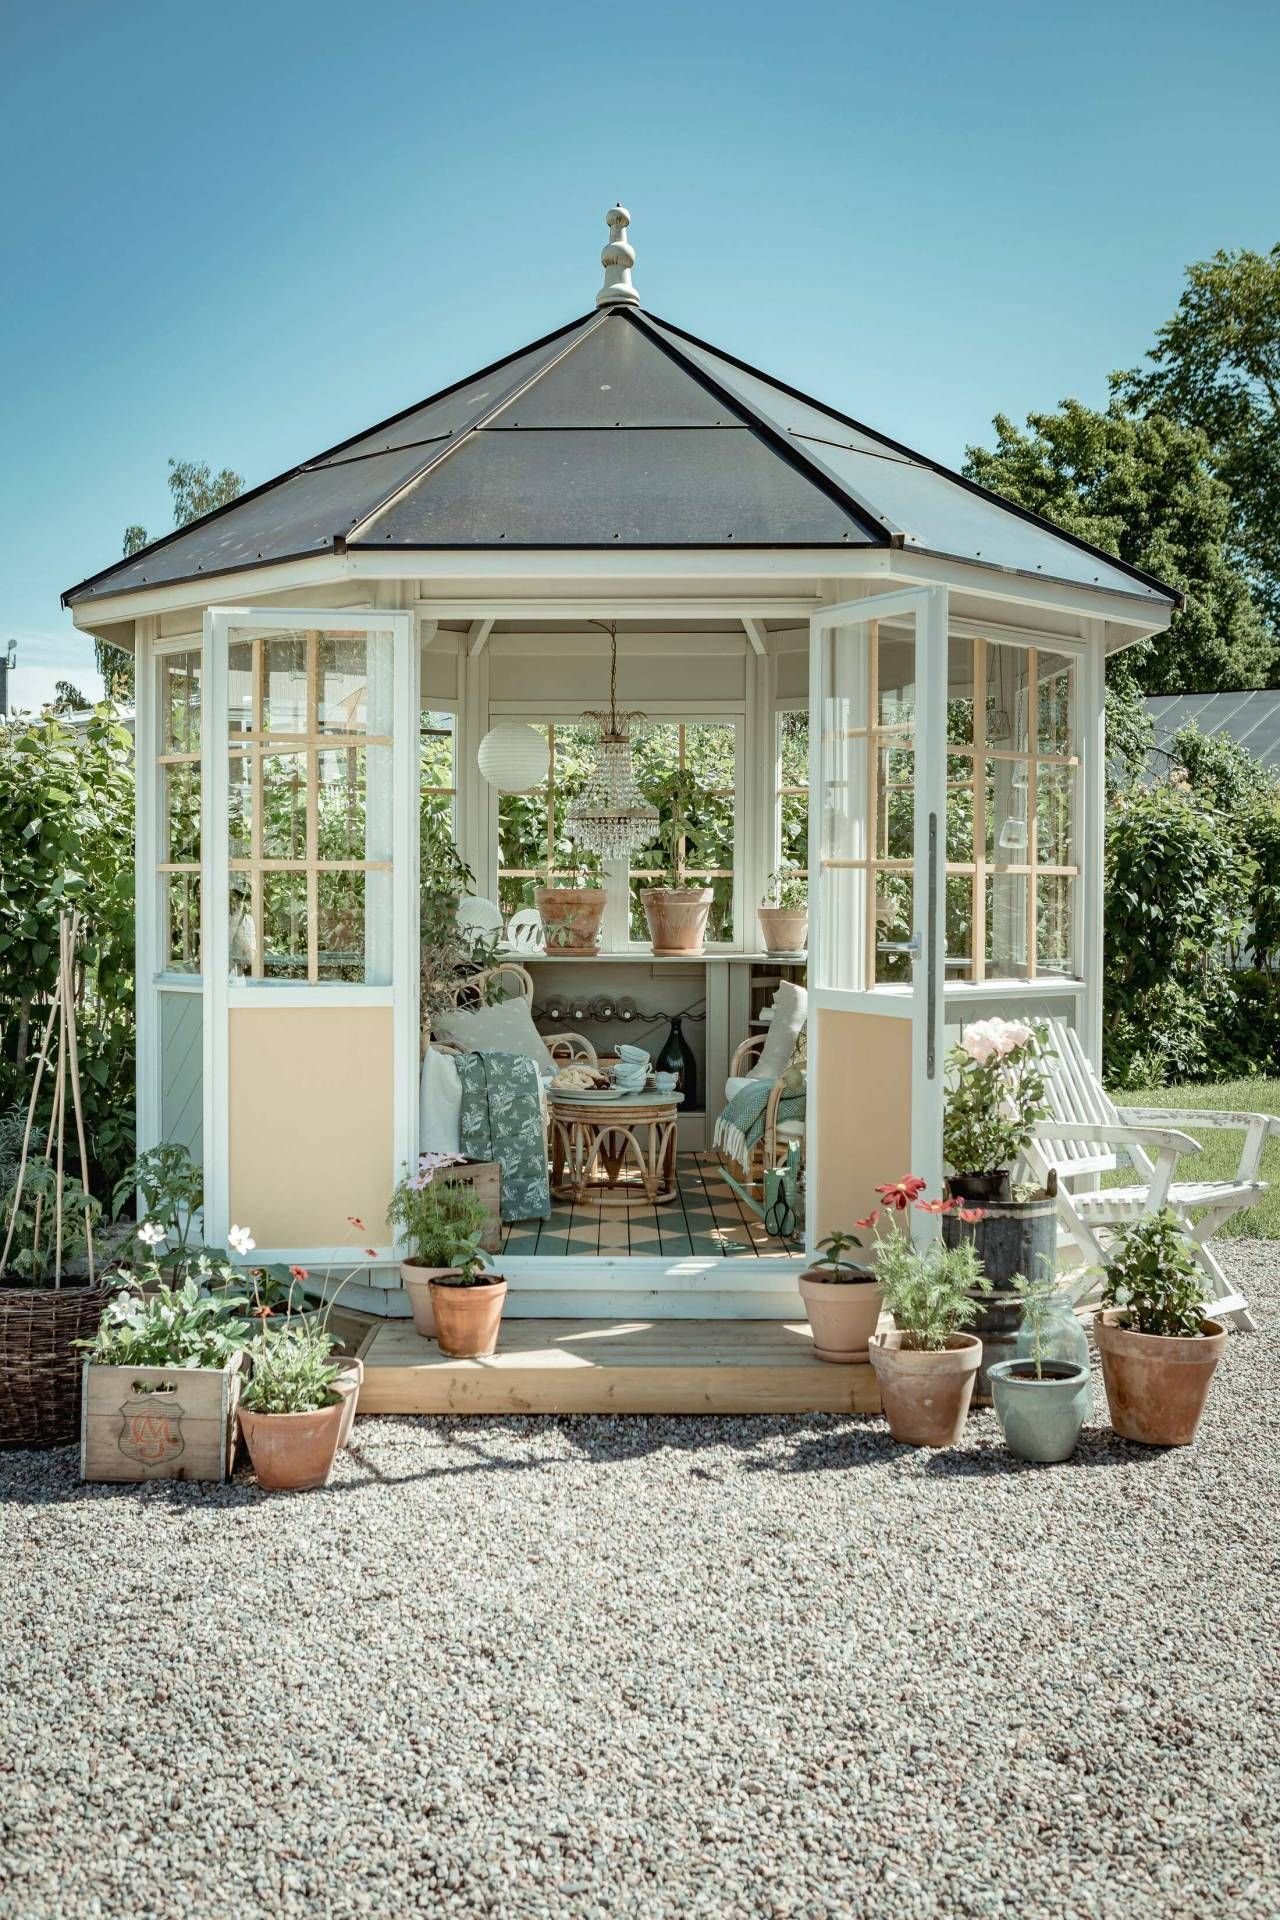
1. Choose the Right Gazebo for Your Specific Yard — Not the One You Wish You Had
Ambition in gazebo shopping is a trap.
The biggest, grandest structure you can find looks extraordinary on an expansive estate. In a regular suburban yard, it overwhelms the space, crowds out the lawn, and makes everything feel smaller than before.
Buy for the yard you have. Measure it. Note what else needs to stay in it. Then shop within those constraints.
Smaller yard: a compact 8-foot canopy or pergola is proportionate and elegant. It creates the destination without dominating.
Medium yard: a 10-to-12-foot hardtop is the sweet spot. Big enough for real comfort, appropriately scaled for most yards.
Larger properties: scale up and zone out. A larger pavilion anchoring a lounge area, with a hammock and other elements nearby, creates a garden with multiple moments to discover.
Match the style of the gazebo to the style of your home. Modern, traditional, rustic — whatever the house speaks, the structure should answer in the same language.
2. Invest Time in Finding the Best Location Before You Commit
The default answer — middle of the lawn — is almost always the wrong answer.
That spot is typically the most exposed, the sunniest, and the furthest from the back door. It’s where you’d logically put something meant to be admired from a distance, not somewhere you’d actually want to spend two hours on a summer evening.
Spend a real afternoon in your yard before making this decision. At different times. In different conditions.
Notice where the sun is brutal at 3 PM. Notice where a natural breeze makes things comfortable. Notice how far it feels to carry things from the kitchen at different distances.
Three things to lock down:
Shade. Natural shade from trees or structures lets you use the space without feeling like you’re being cooked.
Access. The closer to the house, the more frequently you’ll use it. Proximity drives behavior.
View. Orient the seating toward the most attractive sight line in your garden. This is what you’ll look at every time you sit there.
Right location = a gazebo you use every day. Wrong location = a gazebo you avoid and eventually resent.
3. Create a Real Floor Surface Under the Gazebo
Grass underfoot sounds appealing in theory. It is not appealing the morning after any significant rainfall.
Muddy, waterlogged grass makes the space unusable after storms, causes furniture to sink and shift, and creates conditions where everything at ground level starts to smell of damp within a few months.
A proper surface removes all of this. Choose based on your budget and your desired finish.
Pea gravel: quick to install, economical, excellent drainage. Landscape fabric underneath, a few inches of gravel on top, done. The sound underfoot is unexpectedly pleasant.
Pavers or flagstone: requires more effort and planning, but creates a result that looks intentional and permanent. Properly bedded pavers need almost no maintenance for years.
Composite decking: the premium finish. Consistent, warm, maintenance-light, and the material that most closely replicates the feel of an indoor room underfoot.
All options require one thing first: a level ground surface. Level it properly and your floor will stay level. Skip it and you’ll have pooling water and furniture that never quite sits right.
4. Layer Your Gazebo Lighting to Create Real Atmosphere
Lighting changes everything. Not one bright source. Layered, warm, multi-directional lighting.
This is the element that separates a space that looks ordinary by night from one that looks like it belongs in a resort catalog.
The ambient layer: String lights strung across the overhead frame. Warm white bulbs, always — they give the light that flattering, honeyed quality that cool white never achieves.
The task layer: a lantern or compact battery lamp on the table. Enough to see what you’re doing once the sun drops, without overpowering the softer ambient light around it.
The accent layer: Solar stake lights around the perimeter, or low LED strips along the base edges, so the structure glows upward from the ground at night.
Three layers working together produce depth, warmth, and the kind of nocturnal ambiance that keeps people outside long after they would otherwise have gone in.
And since the majority of these run on solar power, the setup cost is also the maintenance cost. After installation, it simply runs itself.
5. Add Strategic Privacy to Make Relaxation Actually Possible
There is a physiological reason why full exposure to other people’s gaze prevents real relaxation.
The nervous system reads being observed as a mild social threat and maintains a partial state of alertness. The shoulders don’t drop. The mind doesn’t quiet. You never fully arrive in the moment.
Simple screening changes the nervous system’s assessment of the situation. You feel sheltered. You can actually let go.
Weather-resistant curtain panels hung on the gazebo posts are the most versatile solution. Close them, open them, tie them back — the level of enclosure changes with your mood and the time of day.
A planted trellis with a fragrant climber gives privacy that evolves beautifully season after season. Jasmine and wisteria are particularly effective — dense, fast-growing, and the scent is extraordinary.
Large statement planters with tall grasses or bamboo provide screening you can reposition as needed.
Rule of thumb: screen two or three sides, leave one or two open to the garden. Enclosed enough for comfort, open enough for the space to breathe.
6. Approach Furnishing with the Same Intent You’d Apply Indoors
The furniture you choose determines whether people stay or drift back inside after ten minutes.
Under-furnished outdoor spaces get under-used. It’s that simple.
Bring to your gazebo the same consideration you’d apply to a room you love inside the house. Start with seating that’s genuinely inviting: deep-cushioned outdoor lounge chairs or an outdoor loveseat with substantial cushioning. The measure is simple: you should want to be in it for a long time.
Add a central table — a place to put a drink, a book, a plate. Without a surface, conversations and mealtimes become logistically awkward in ways that subtly put people off spending time there.
Finish with the layers that make it feel complete: outdoor cushions and throws, an outdoor area rug anchoring the space underfoot, colors and textures that make the space feel deliberate.
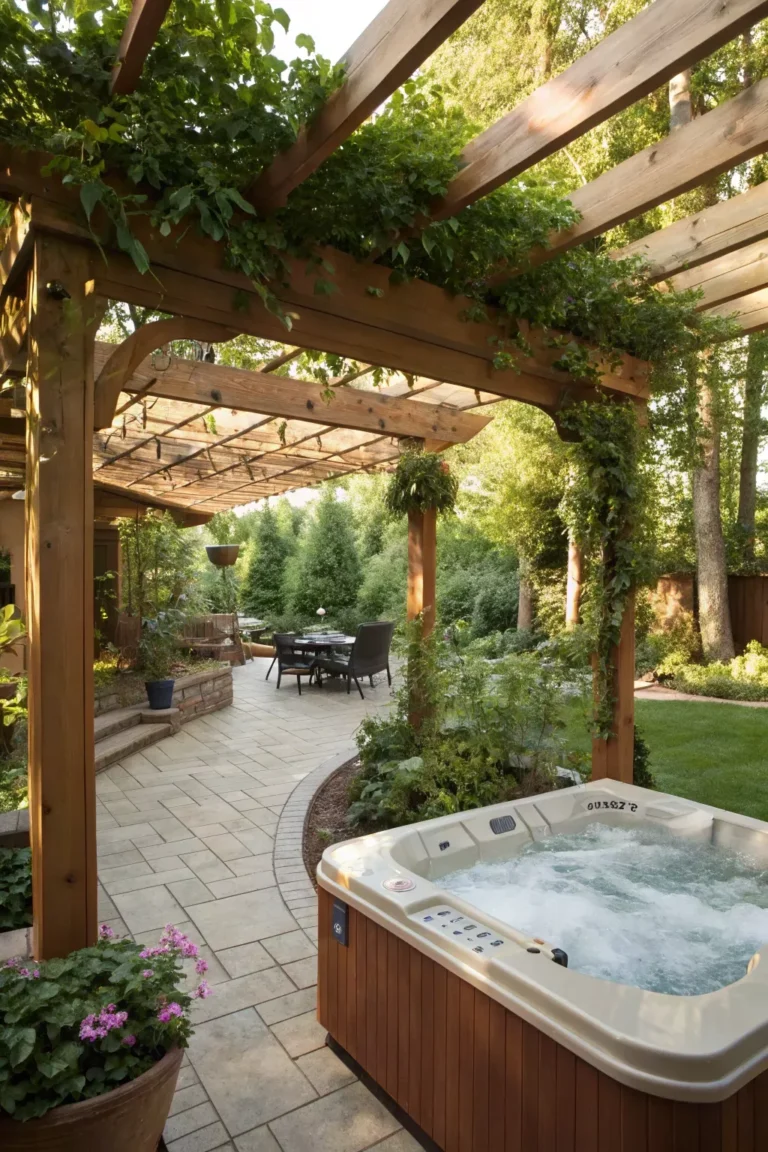
7. Frame the Gazebo with Plants to Root It in the Garden
The reason newly installed gazebos often look awkward isn’t the gazebo itself. It’s the absence of anything connecting it to the surrounding landscape.
Plants are that connection. They transition between hard material and soft garden, making the whole thing look like it was planned together rather than assembled separately.
At the base of the structure: low plants that spill gently around the posts. Lavender, creeping thyme, compact ornamental herbs. Softens the edges and adds fragrance.
Around the perimeter: medium-height shrubs or ornamental grasses that frame the gazebo and visually anchor it to the ground. They create the impression that the structure has been there long enough for the garden to grow around it.
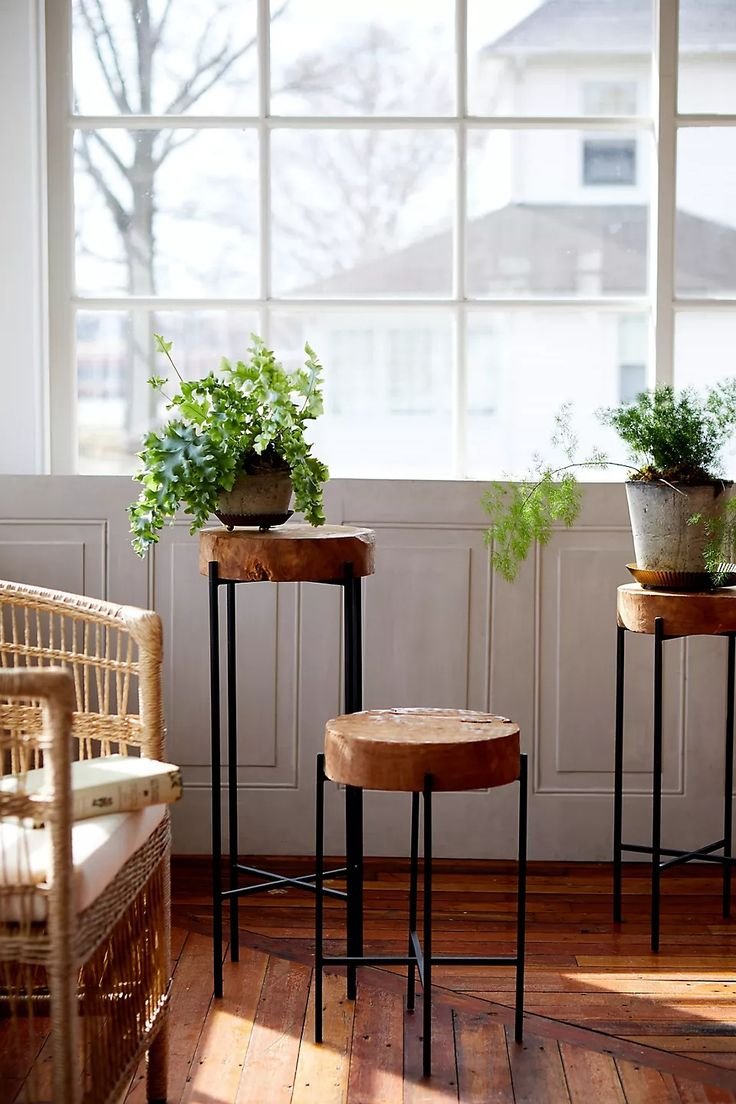
Inside and above: Hanging baskets with trailing greenery from the rafters, pots of ferns and architectural plants inside at floor level, a tabletop herb planter for fresh cuttings while you’re sitting there.
Go low to high in your layering. The depth this creates is what transforms a tidy space into a lush and living one.
8. Think Beyond How It Looks — Design for How It Feels
Beautiful spaces that only engage the eyes don’t become the retreats people return to every day.
The spaces that genuinely restore you are the ones that wrap around all your senses at once.
Sound: a solar-powered water fountain close to the seating creates a consistent background of soft water sounds. The effect on stress and noise sensitivity is immediate and pronounced.
Supplement with low-tone wind chimes — the kind that sound rich and resonant rather than tinny.
Scent: fragrant herbs planted within reach. Every movement of air carries the scent of rosemary, mint, or lavender toward the seating. A citronella candle handles the mosquito problem and adds a warm, scented glow at the same time.
Touch: vary the surfaces around you deliberately. Rough and smooth. Hard and soft. The variety of textures your hands and feet encounter as you move through the space communicates quality, care, and richness even before the eye registers it consciously.
Design every sense and the space becomes transformative. Design only for the eye and it remains merely decorative.
9. Weatherproof Everything Now — So You Don’t Rebuild Later
Weather is the enemy of outdoor spaces that haven’t been properly prepared for it.
And it’s a patient enemy. Mold arrives slowly. Rot takes a season or two to establish. Rust spreads gradually. And then one spring you look at your beautiful setup and realize it needs to be half replaced.
Get ahead of it now.
Cushions: weather-resistant fabric covers or quick-dry insert foam. Move them to a weatherproof deck box when heavy rain is forecast. Two minutes of work, significant protection gained.
Wood: apply quality exterior sealant or stain every one to two seasons. It prevents moisture penetration and dramatically extends the usable life of wooden elements.
Metal: annual rust inspection. Catch small spots early and address them with rust-inhibiting paint. Let them go and they spread into structural deterioration.
Fabric curtains and canopy covers: remove them before winter and before serious storm weather. Stored dry and folded, they last essentially indefinitely.
The upkeep is small. The payoff is a space that stays as good as the day you built it.
10. Secure the Gazebo So It Stays Where You Put It
Safety first. Always. Especially with structures exposed to weather.
An unanchored gazebo — particularly canopy and pop-up styles — becomes dangerous in serious wind. It lifts, it travels, it lands somewhere you don’t want it to. This is not a theoretical scenario. It is a documented, repeating annual event in gardens and backyards across the country.
The fix is simple and permanent.
Soft-top and canopy gazebos: heavy-duty ground anchors (not the kit stakes) on every leg, sandbag weights distributed evenly, and guy ropes in regions with strong seasonal winds.
Hardtop and permanent structures: poured concrete footings or anchoring directly to an existing deck or slab. No improvisation, no substitutions, no “I’ll do it properly next year.”
Get the anchoring done properly during installation. After that, you can sit through any storm and never once think about it.
Peace of mind in your own garden is not a small thing.
The Backyard You Want Is Waiting for You to Build It
Ten practical tips. All achievable. None requiring a professional or a budget that’s out of reach.
The only thing that converts this information into a better outdoor space is taking the first step.
So choose the simplest one. The smallest possible action that’s within reach today.
Hang the lights. Lay the rug. Pot the lavender.
Each small thing makes the next one easier. And somewhere in that accumulation, without fully noticing the transition, your backyard becomes the kind of place you actually want to be.
That’s the goal. And it’s closer than it looks.
Start now.
🔍 Yoast SEO Checklist
🔍 Focus Keyphrase: gazebo garden oasis
📌 SEO Title (< 60 chars): How to Create a Cozy Garden Oasis with Gazebo Tips
🔗 Slug (< 60 chars): cozy-garden-oasis-gazebo-tips
📝 Meta Description (< 155 chars): Transform your backyard into a cozy garden oasis with these expert gazebo tips on placement, lighting, privacy, and more. Start building your retreat today!